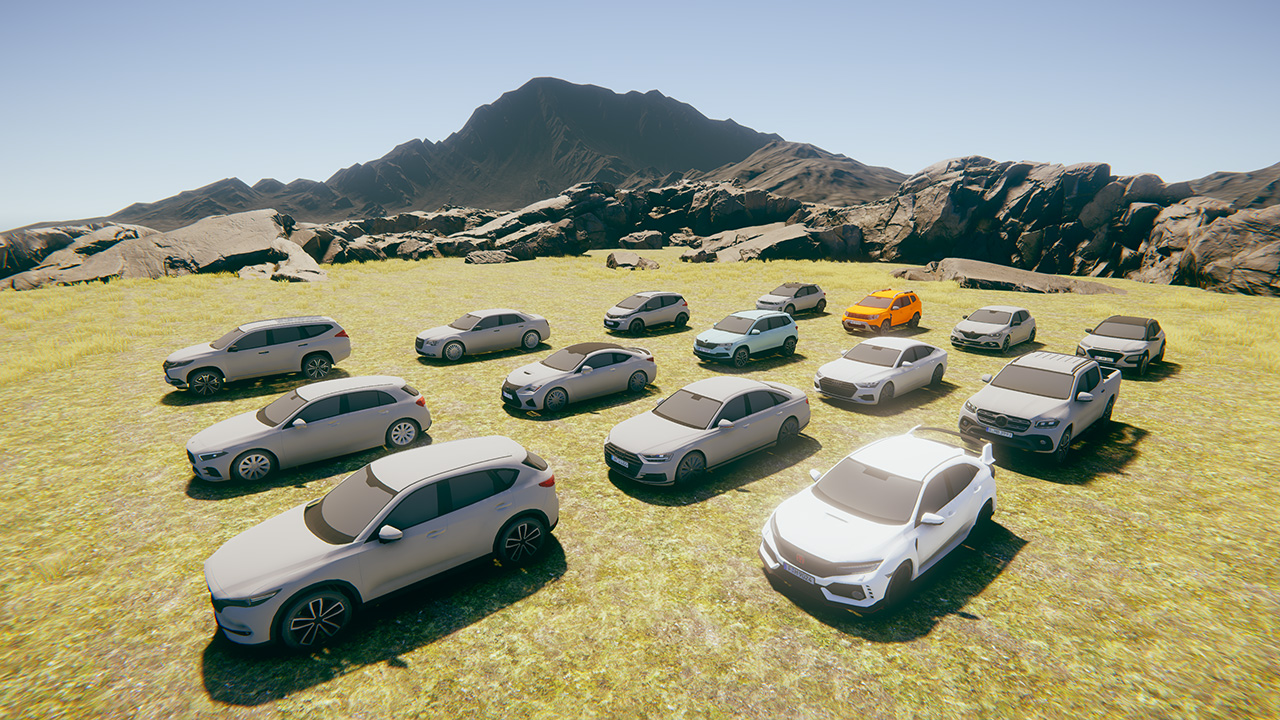
Unity 3D
Importing Dosch 3D models to Unity3D
Overview
Importing Dosch Design models is a straightforward process. However, sometimes techniques need to be applied to ensure the best outcomes for your imported model.
Unity3D setup
Setup a scene in Unity3D to import your models into for packaging. I recommend you don’t import models into a scene you are working on because you may need to do one or more of the following:
- Remove elements of the model (from 3D applications export) that you dont need like Cameras, Lights, BlendShapes etc.
- You may want to keep the exported hierarchy or model structure.
- The model may have a facing direction not suited to your placement.
- The model may not match the scaling in your scene.
- Materials may need to be exported if you need to modify them.
There are many other reasons but keeping your import process within another empty scene will make your use of models much easier.
The scene should include: A plane (Grass covered plane), a reference object (Man), a Directional Light and a Camera.
Like this:
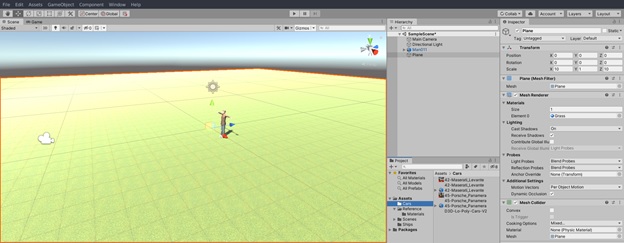
A reference object will be needed to check the scaling. Bring an object into the scene that you are using in your application or game. In these examples we are using a character.
Import model
Create a folder in your project assets folder for importing the model.
When using Dosch Design models, I recommend using the OBJ formats. 3DS and FBX models can be imported, but there are known issues with these formats being imported into Unity3D.
When an OBJ file is placed into the folder, Unity3D will import them. With OBJ files please wait. Some large poly objects can take minutes (and even hours) to import depending on their complexity. If this is taking too long, please try the 3DS or FBX versions - the procedures below are the same.
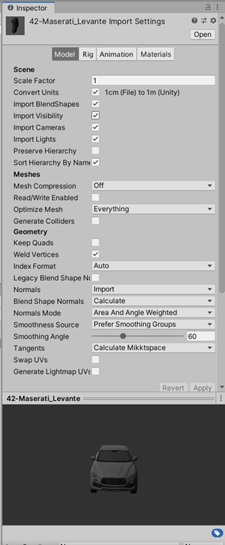
Model Import Settings
The model import settings are important and they generally determine the performance and structure of the model that is imported into Unity3D. Before placing any model in the scene, these settings should always be checked.
Scale factor: Import scale size. Generally dont touch this.
Import BlendShapes, Import Visibility, Import Cameras and Import Lights can all be disabled.
Sort Hierarchy By Name can be disabled, if so, I recommend enabling Preserve Hierarchy.
Dont change Meshes settings.
Weld Vertices - can be useful if textures look odd.
Blend Shape Normals - may be set to Calculate if the shading does not look correct.
All other settings on this panel should be left as default.
When importing non character objects the Rig Settings can be left as default.
Animation Import Settings
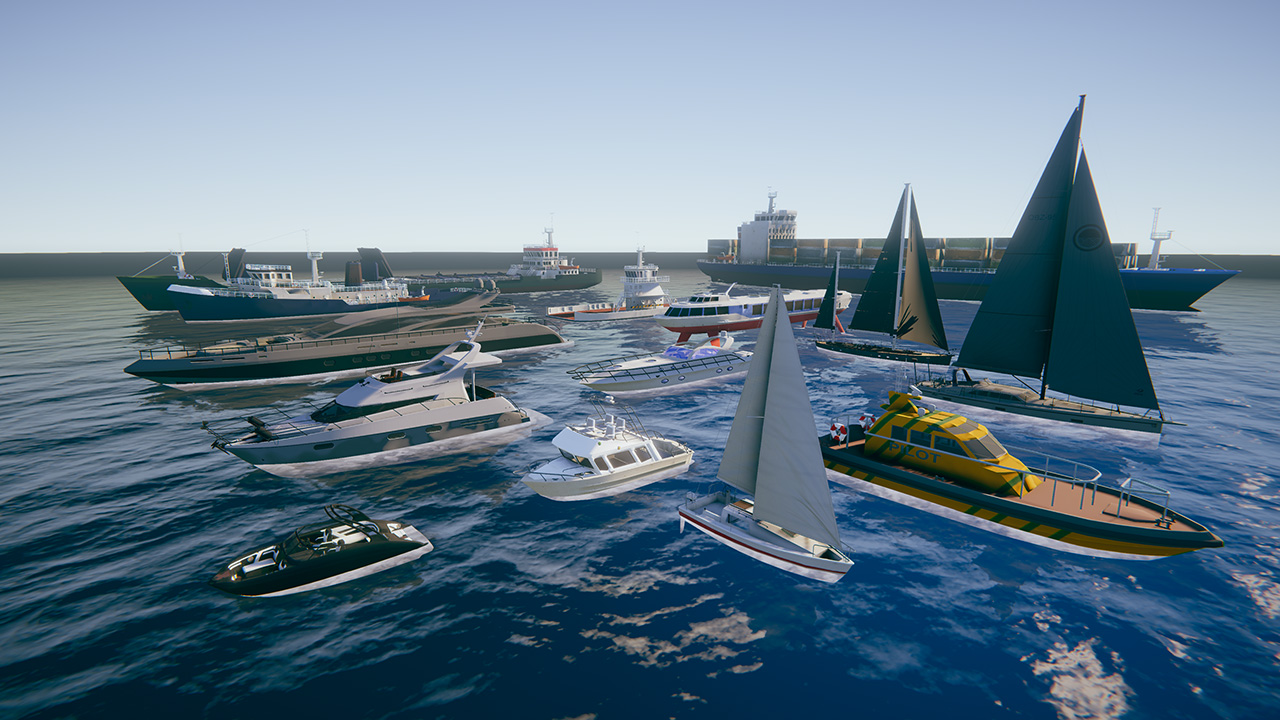
Dosch Design vehicles and ships generally don’t have any animation.
Import Animation should be unchecked.
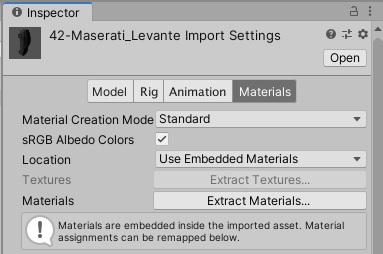
Material Import Settings
If you need to modify the materials after you have imported the models, then you will need to do the following here:
Press “Extract Materials” to extract materials to a folder.
When the dialog appears, type a name for the folder to extract to.
Scene Placement
The model has now been setup for placement into the scene.
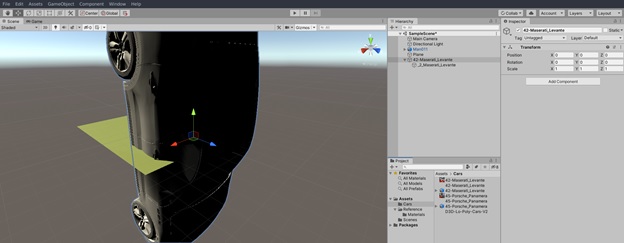
Drag the model into the Hierarchy View or the Scene View window.
The model may appear like so (we will rectify the scale and rotation below):
In the inspector panel make sure the root has been reset (Position, Rotation are zero, Scale is 1).
Unity3D Transform
Right-Click on the model in the hierarchy and select “UnPack Prefab Completely”.
To change the model position, scaling or rotation do the following:
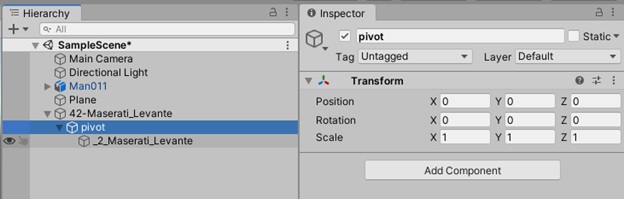
1. Create a new Empty Object and reset its transform.
2. Label the new Empty Object “pivot”
3. Place the pivot in the model hierarchy so that it is a child of the root object.
4. Select all other child objects (not the pivot) and place them under the pivot. Making the pivot the parent of all the child objects.
The object should look similar to:
Rotate model
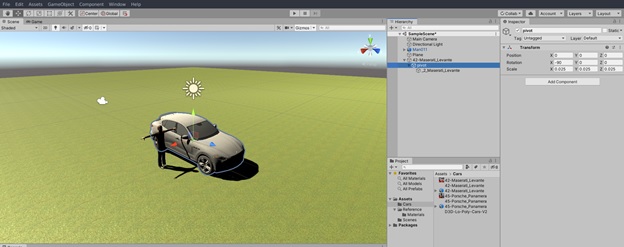
Select the pivot object and change the Rotation values in the transform to match the expected direction the model should be facing when placed in a scene initially.
Note: See the rotation of -90.0 in the X value of the Rotation. This was needed to turn the car.
Scale model
Select the pivot object and change the Scale values in the transform to match the expected scale against your reference object.
Drag the reference model around the imported object to make sure the scale looks correct (Man011 is the ref in this scene). If you have a reference measurement tool - use that.
Note: A scaling of 0.025 on X, Y and Z scale values make the car the correct size.
Depending on your use case you may need to adjust scaling to suit your scene.
Position model
Select the pivot object and change the Position values in the transform to match the expected position that needs to be offset when placed in a scene.
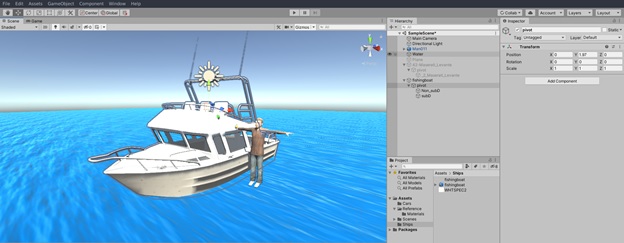
Note: Placing Ships will need to have their Y axis modified so they “sit” in the water correctly.
Finishing Touches
Check the materials in the model to make sure they are correctly assigned. If you need to change textures or modify smoothing information then follow the instructions in the Materials Settings section.
The model is now ready to use. Select the model parent node in the hierarchy tree and drag it into your assets folder (where you put your original Dosch Design files).
A prefab will be created with all the above information embedded into the prefab.
When you want to use the model in your application you can now drag that prefab into any scene in the project and the model should look great!
Once you have completed this procedure a few times, it should be possible to successfully import a new model very quickly.